Auto-Publish to Your Static Site
From AI-generated article to live static page — without touching your code editor.
The Problem
You run a static Astro site. Every new blog post means the same ritual: export the text, format the frontmatter, download the cover image, commit, push, wait for the build. It's reliable — but it's also slow and manual.
Nuanta eliminates that entire loop. When an article finishes your pipeline, Nuanta fires a webhook to GitHub. A small GitHub Action catches it, writes the Markdown file, downloads the cover image, commits everything, and your existing deployment (Vercel, Netlify, Cloudflare Pages) picks it up automatically.
The result: you click "Publish" in Nuanta, and the post appears on your site minutes later.
How It Works
- Nuanta sends a
repository_dispatchevent to your GitHub repo via webhook - GitHub Actions receives the article payload (title, slug, Markdown content, cover image URL, excerpt, tags)
- The workflow creates a
.mdfile insrc/content/blog/, downloads the cover image topublic/, and commits - Your CI/CD pipeline rebuilds the Astro site with the new post
Step 1 — Add the GitHub Action
Create .github/workflows/new-article.yml in your Astro repository.
The workflow listens for Nuanta's dispatch event, extracts the article data from the payload,
and commits a new Markdown file with proper frontmatter.
We maintain a ready-to-use example repository with the complete workflow and a working Astro blog template:
→ github.com/nuanta/demo-astro
Clone it, fork it, or just copy the workflow file into your own project. Here's what the workflow does when triggered:
- Checks out your repository
- Creates a Markdown file with frontmatter in
src/content/blog/ - Downloads the cover image to
public/blog-images/ - Commits both files and pushes to your
mainbranch
The payload fields you can reference in the workflow:
Key Payload Fields
The GitHub Action maps Nuanta's webhook payload to environment variables:
github.event.client_payload.title— Article titlegithub.event.client_payload.slug— URL-safe sluggithub.event.client_payload.markdown— Full article body as Markdowngithub.event.client_payload.excerpt— Short description / metagithub.event.client_payload.cover_image_url— Cover image URL (downloaded automatically)github.event.client_payload.tags— Comma-separated tags
Step 2 — Generate a GitHub Token
Nuanta needs a Personal Access Token (PAT) to trigger the workflow in your repository.
- Open the GitHub token creation page
- Select Tokens (classic) — not Fine-grained
- Name it something descriptive (e.g., Nuanta Webhook)
- Check the
reposcope - Click Generate token and copy the value (starts with
ghp_)
Step 3 — Connect Nuanta
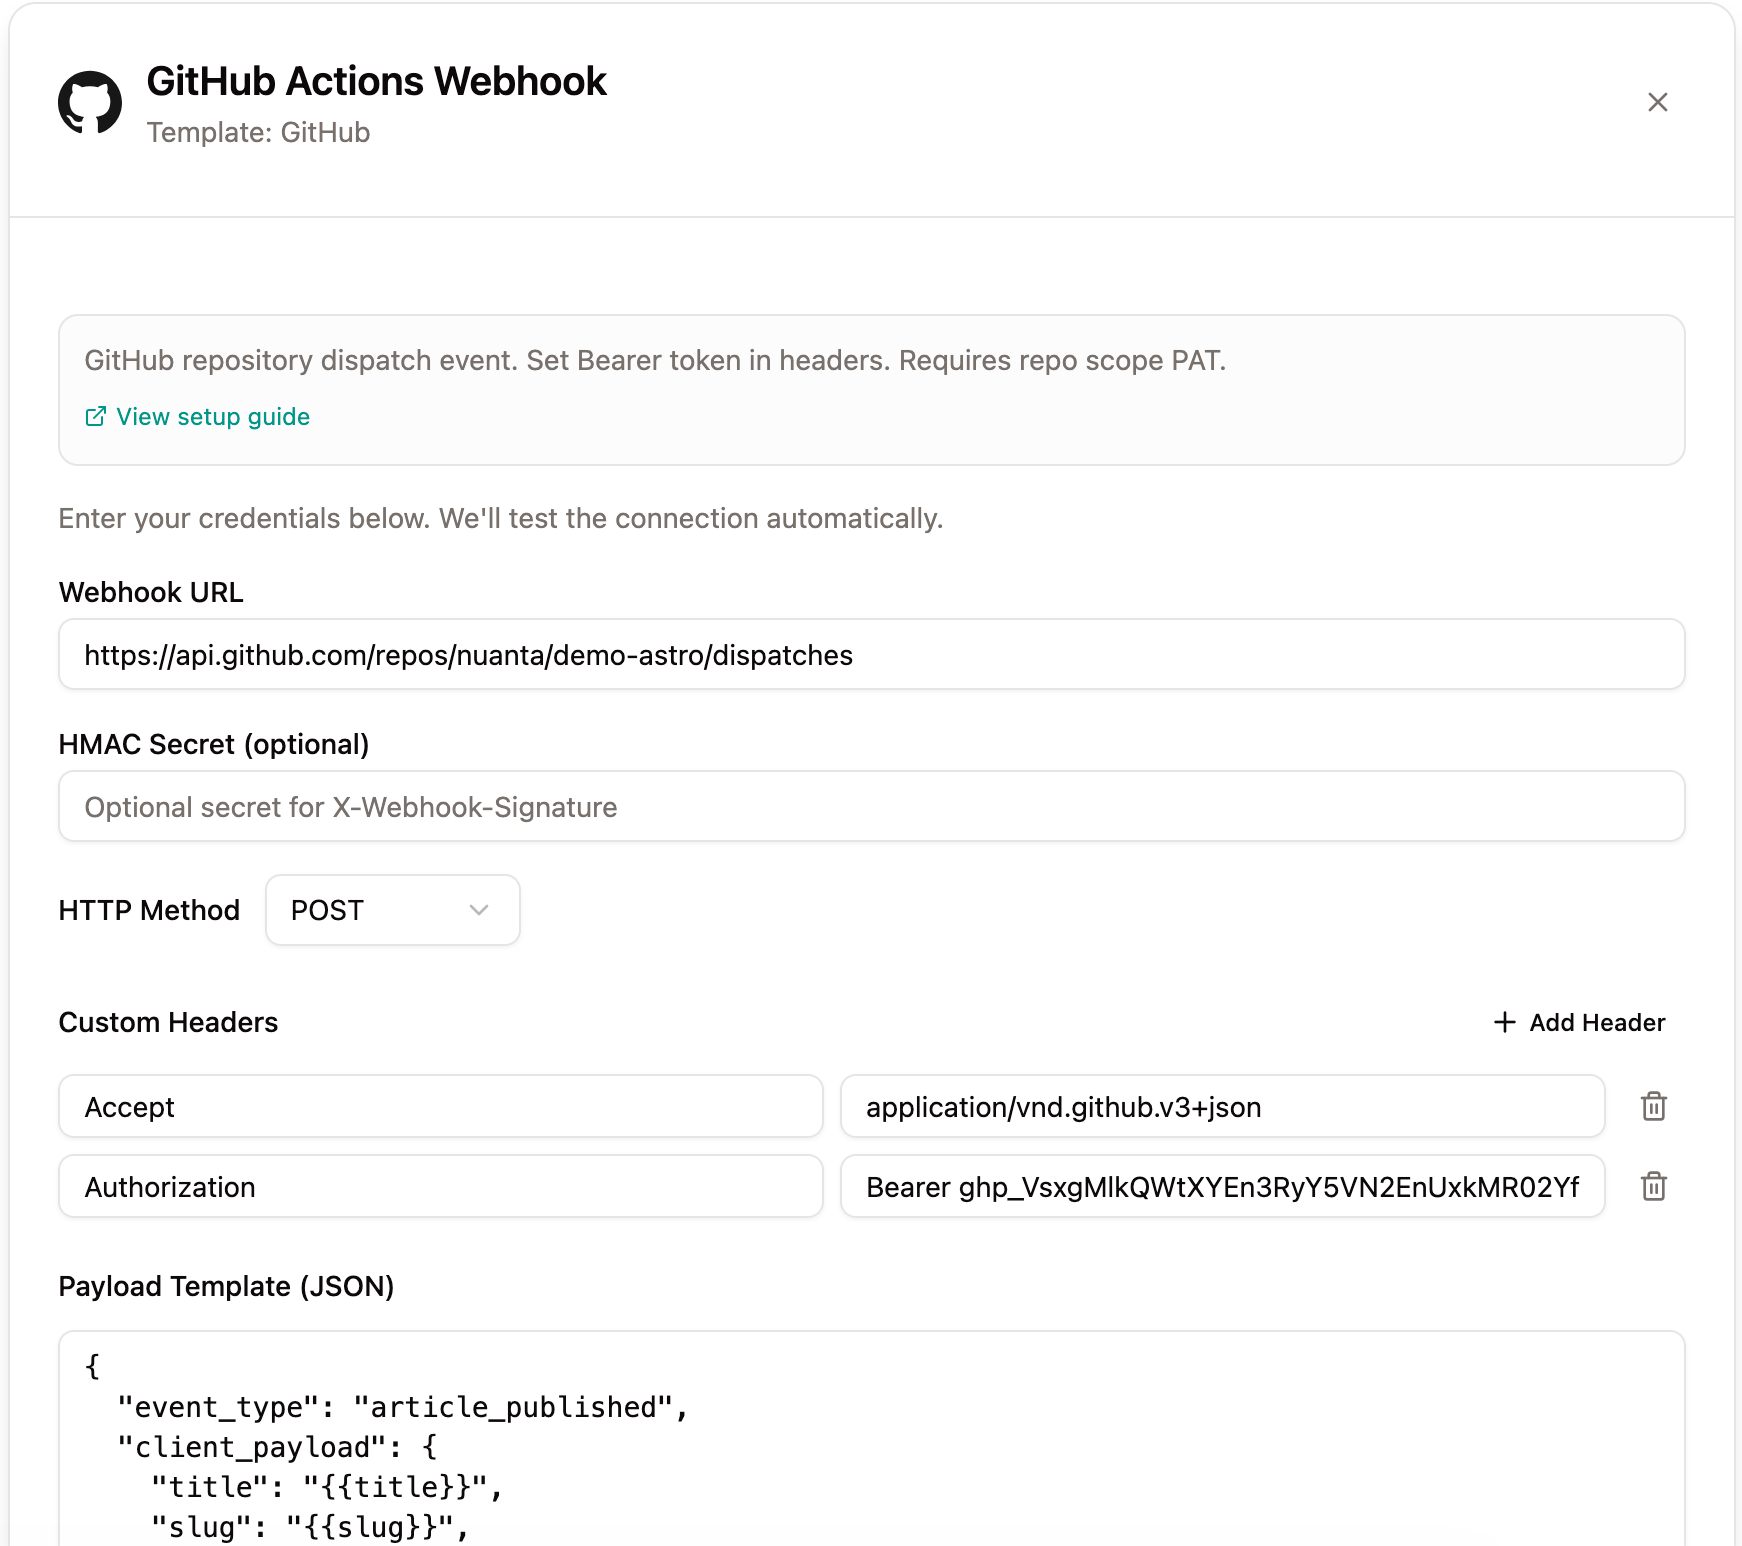
In Nuanta, go to Integrations → click Add Integration → select GitHub Actions. The GitHub preset pre-fills the correct headers and payload template for you.
⚙️ Connection Settings
The GitHub preset pre-configures headers and the payload template. You only need to fill in two fields:
- Webhook URL:
https://api.github.com/repos/YOUR_OWNER/YOUR_REPO/dispatches - Authorization header: replace
<GITHUB_PAT>with your token, e.g.Bearer ghp_abc123...
Your configuration should look like this:
Step 4 — Publish
That's it. Progress any article through your Nuanta pipeline to the Publish stage, select your GitHub webhook integration, and hit Publish Now.
Open the Actions tab in your GitHub repository — you'll see the workflow run, commit the new post, and trigger your site's rebuild. The article will be live within minutes.
Other Static Site Generators
This guide uses Astro as the example, but the same webhook + GitHub Actions pattern works with Gatsby, Hugo, Jekyll, Eleventy, or any SSG that reads Markdown files. The only thing you need to change is the file paths in the workflow:
- Gatsby — content goes in
content/blog/ - Hugo — content goes in
content/posts/ - Jekyll — content goes in
_posts/